I'm currently putting together a test automation framework that will handle both UI and APIs for some new development my company is starting.
Rather than start from scratch, I'm leveraging open-source libraries like Thucydides. One of the framework requirements is to be able to verify responses from REST services using Java and BDD.
One of the open-source libraries that I've found meets all our needs is REST-Assured.

What is Rest-Assured?
Rest-Assured is an open-source Java Domain-specific language (DSL) that makes testing REST service simple. It simplifies things by eliminating the need to use boiler-plate code to test and validate complex responses. It also supports XML and JSON Request/Responses.
Let's take a quick look at how to get started using Rest-Assured in Java with Maven.
Getting Rest-Assured set up in your pom.xml file
The first thing you'll need to do is add the following REST-Assured dependency to your project's pom.xml file:
<dependency>
<groupId>com.jayway.restassured</groupId>
<artifactId>rest-assured</artifactId>
<version>2.1.0</version>
<scope>test</scope>
</dependency>
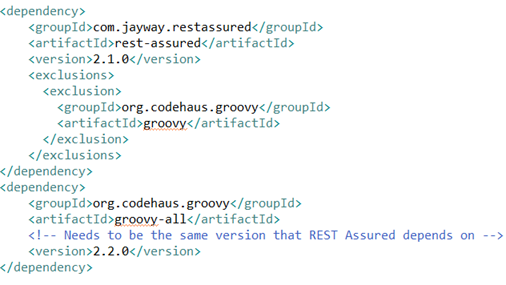
For me, this actually caused a classpath clash with groovy and jersey-spring due to incompatibility issues. Because of this, I had to add an exclusion and the following groovy-all dependency in order to get it to work in my environment:
<exclusions>
<exclusion>
<groupId>org.codehaus.groovy</groupId>
<artifactId>groovy</artifactId>
</exclusion>
</exclusions>
<dependency>
<groupId>org.codehaus.groovy</groupId>
<artifactId>groovy-all</artifactId>
<!– Needs to be the same version that REST Assured depends on –>
<version>2.2.0</version>
</dependency>
So the final pom.xml entry looks like this:
Sample REST Service to Test
Being a confirmed bibliomaniac, I normally use my favorite Google Rest service, GoogleBooks, for test examples, but my company's network blocks access, so in case you have the same issue I decided to use a local install or WordPress with a REST plugin for our examples. Now you shouldn't have any excuse for not trying this yourself! J
First, we need an application to test in which we can use both UI and REST APIs, so we will install a local copy of WordPress on our machines. This is actually pretty simple when using Microsoft WebMatrix, which makes it easy for anyone to create a local WordPress site.
Install local copy of WordPress
Simply navigate to the following URL, run the wordpress.exe and follow the install wizard:
- http://www.microsoft.com/web/wordpress
It will automatically install all the things that WordPress needs to run locally on your machine.
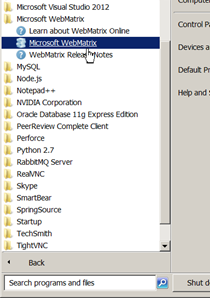
- Once installed, you should have an option for Microsoft WebMatrix in your All Programs menu option:
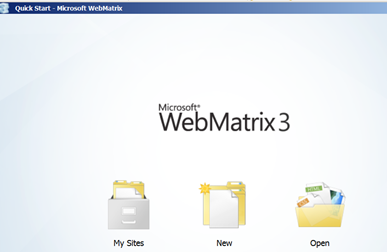
- Clicking on My Sites will give you an option to select WordPress. WordPress should now be running. (If it's not, click on the start button option.)
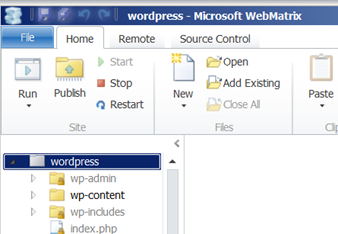
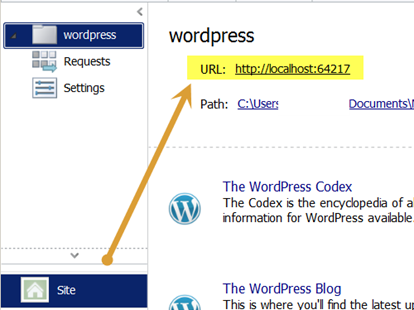
- Click on the Site icon to find out what your local WordPress URL is. (Your port number may be different than mine.)
Install JSON API Plug-In
Next, we need to install a JSON API plugin which we'll use to interact with WordPress using REST-Assured.
- Navigate to: http://localhost:64217/wp-admin/
- Click on the Plugins menu option
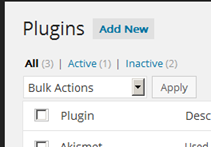
- Click on Add New
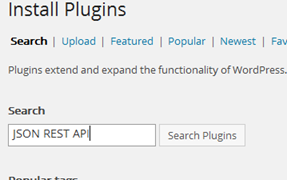
- Search for JSON REST API and click on Search Plugins
- Click on the JSON REST API Install Now link
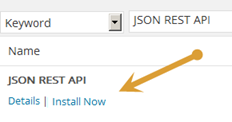
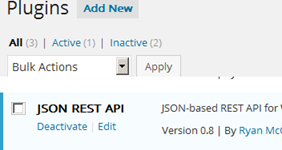
- Click on the Plugins>Installed Plugins menu option and make sure that the JSON REST API is activated
Become Familiar with the WordPress JSON API
Once everything is installed, you'll probably want to do some ad-hoc testing to become familiar with what is returned in the WordPress JSON response.
An excellent tool for learning your REST API and doing some exploration on which type of test you want to create – as well as which response values you may need to capture when you start coding your API tests — is a Google Chrome App REST Console.
REST Console is an HTTP Request Visualizer and Constructor tool which helps developers build, debug and test RESTful APIs. To install, open up a Chrome browser:
- Navigate to:
https://chrome.google.com/webstore/detail/rest-onsole/cokgbflfommojglbmbpenpphppikmonn?hl=en
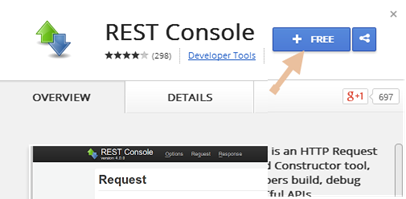
- Click on the FREE button
-
(You might get prompted to sign into Google)
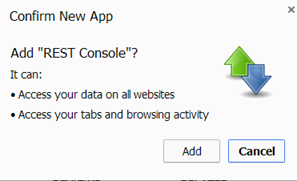
- Click the Add button
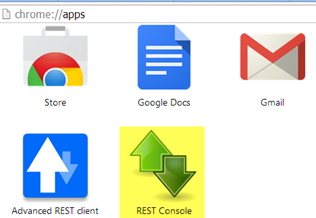
- Once installed, navigate to: chrome://apps
- You should see the REST Console app.
USING REST CONSOLE
Next let's check out a simple GET request that we'll make to WordPress to retrieve details for post 1.
- Open up Rest Console in Chrome
- Add the following to the Request URI field under the Target area(FYI: your port number might be different than mine):
http://localhost:64217/wp-json.php/posts/1
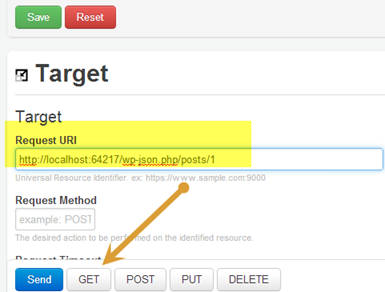
- Click on the GET button
- Under the Response section, you should now see the JSON response
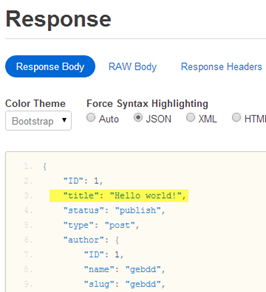
Cool! We're going to use this for our first simple example to send a request using Rest-Assured, then we'll confirm that the response's body contains a title with the value of “Hello world!”
“title”: “Hello world!”,
Finally — using REST-Assured in your IDE
If you've made the proper pom.xml entries we went over at the top of this post, you should be able to begin using REST-Assured.
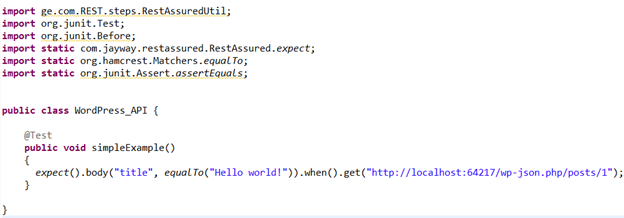
- In your IDE, create a new java class named WordPress_API
- Import the following:
import org.junit.Test;
import org.junit.Before;
import static com.jayway.restassured.RestAssured.expect;
import static org.hamcrest.Matchers.equalTo;
- Create a public method named simpleExample
- Add the junit @Test annotation above it.
- Inside simpleExample, add the following code:
expect().body(“title”, equalTo(“Hello world!”)).when().get(“http://localhost:64217/wp-json.php/posts/1”);
- Your code should look like the following:
- Run the jUnit test.
- The test should pass.

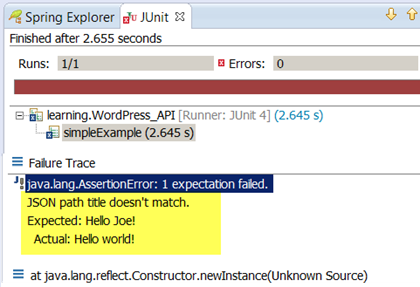
Now — just to prove that this is really working, let's force it to fail so that we can be confident that everything's kosher.
- Change the Hello world! To Hello JOE!
- Rerun the test.
- The test should now fail.
The REST-assured syntax is pretty flexible. For example, we could have also written our test this way:
RestAssured.baseURI = “http://localhost:64217/”;
RestAssured.get(“wp-json.php/posts/1”).then().assertThat().body(“title”, equalTo(“Hello world!”));
Also, if you're familiar with Selenium, REST-Assured can also use hamcrest for testing using hamcrest's library of matchers for building test expressions.

We're just getting started
For some reason, that picture of ham has got my mouth watering, but for now this Post should be enough to whet your appetite. Stay tuned for more REST-Assured post as we work our way through some more examples.
REST-ASSURED – HOW TO POST A JSON REQUEST
REST-assured How to Check Response Times
REST Testing with Java Part Two: Getting Started with Rest-Assured


